Custom dimensions in GA4
In this guide, you will learn what custom dimensions are and how to create them in GA4.
What are the dimensions in GA4?
A dimension is one of your website’s attributes. There is a name and a value for each dimension.
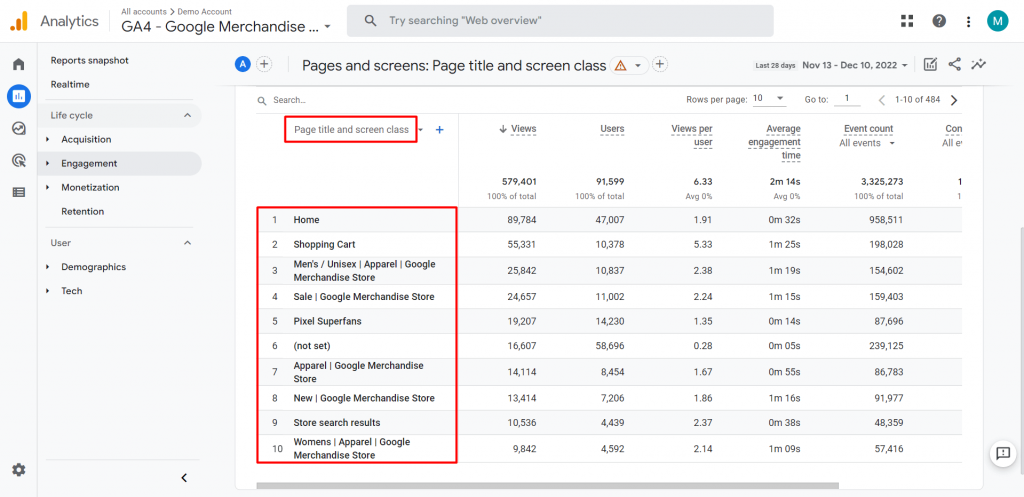
For example, ‘Page title and screen class’ is the dimension name and ‘Sale | Google Merchandise Store’ is one of the values of this dimension.
What are custom dimensions?
Custom dimensions are not a new feature of GA4, though there have been some adjustments. If you’ve used Analytics for a while, you’re probably already familiar with custom dimensions, but for those of you who aren’t yet up to speed, here’s a little introduction.
Your property will automatically collect some by default data whenever you fire any event to Google Analytics. Important details like user identifiers (such as their user ID) and device information are included in the data collected. Naturally, Analytics will also track user behavior on your website and in mobile apps as well as the content they interact with.
However, it’s possible that there may be more information you need to gather that is exclusive to your website and mobile apps. Custom dimensions come into play here. You can set up your property to gather data relevant to your business in addition to the Analytics already recorded, rather than just gathering general data.
An attribute or characteristic (of an event, product, user, etc.) that you want to track is called a custom dimension. For instance, transaction IDs, product IDs or categories, user pricing plans, and so on.
In GA4, you can set up 50 event-scoped custom dimensions and 25 user-scoped custom dimensions per property.
How are Custom Dimensions Different in GA4 vs Universal Analytics?
It’s critical to understand how custom dimensions differ in GA4 from Universal Analytics so you can make the best use of them.
Universal Analytics comes with four types of scopes:
- Session (these apply to all the hits in a single session)
- Hit (limited to only a specific event or hit type)
- User (applicable to all the hits of a user)
- Product (applicable to all the hits of a product tracked with Enhanced Ecommerce)
GA4 comes with two types and scopes of custom dimensions:
- Event
- User
Event-scoped Custom Dimensions
Now, all hits have event-scoped custom dimensions. These are employed when you want to deliver variables or calculated values (parameters) for each event. Given that the majority of activities in GA4 are events, event-scoped custom dimensions may be used more oftenly.
User-scoped Custom Dimensions
You will always utilize user-scoped custom dimensions if you want to deliver values specific to each user. These operate largely in a manner comparable to Universal Analytics, despite the fact that their setup and quota systems are different .
How to create custom dimensions in GA4?
NOTE: YOU CANNOT EDIT A CUSTOM DIMENSION ONCE CREATED.
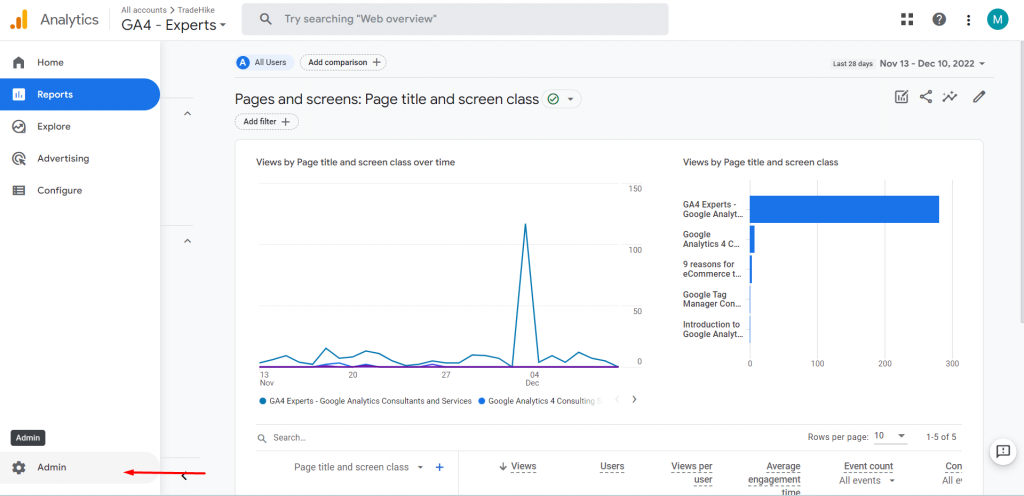
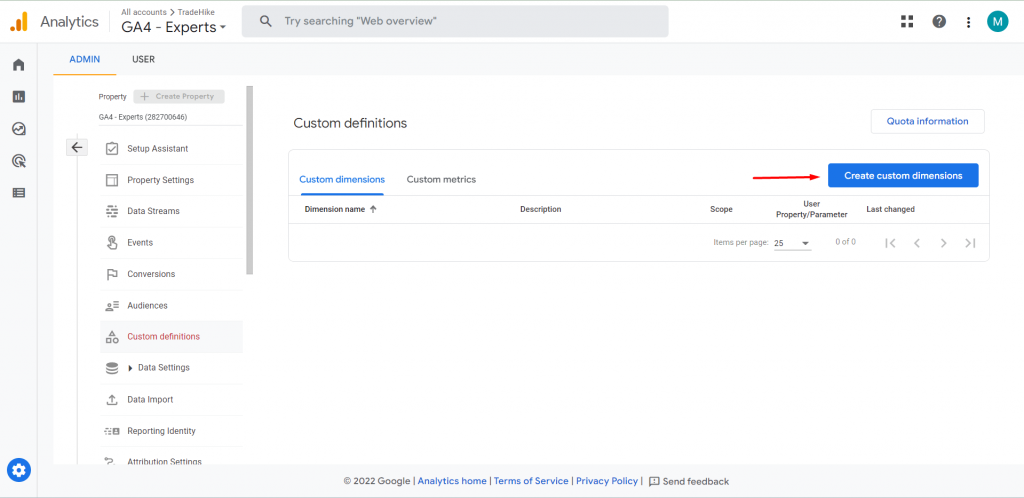
STEP 1: Go to the Admin.
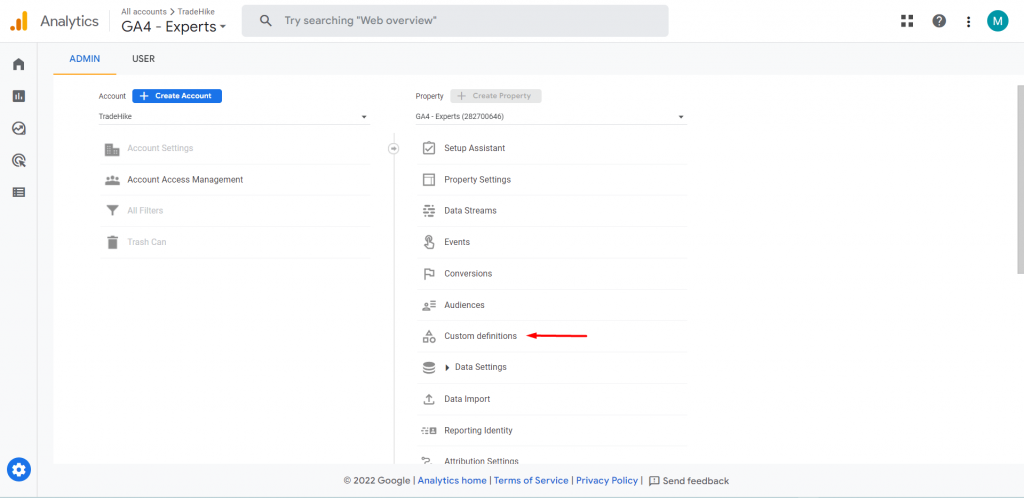
STEP 2: Go to ‘Custom definitions’.
STEP 3: Click on ‘Create custom dimensions’.
STEP 4:
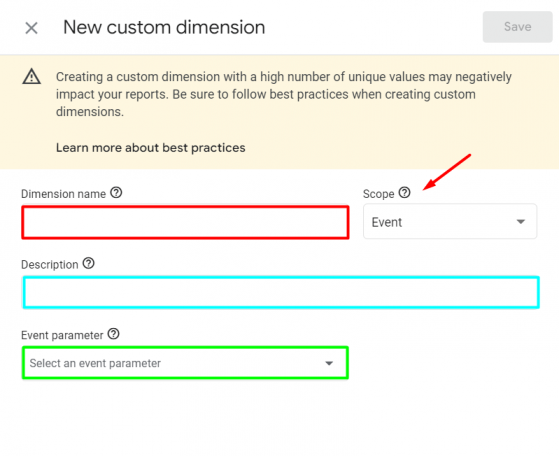
- When you register your event parameters as custom dimensions, there are 4 fields to fill out.
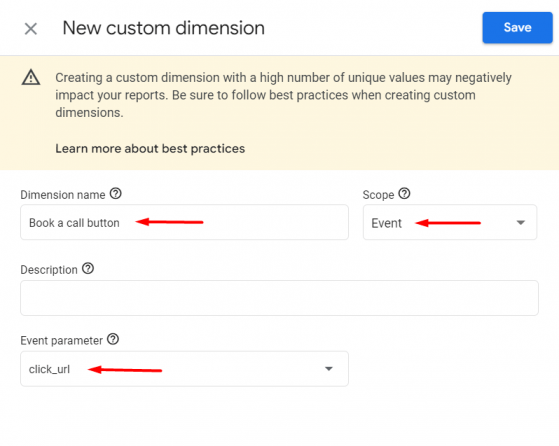
- Give your dimension a name first. This is depicted in the red box below. Use a memorable and easy name for the dimension because it is what will appear in your reports.
- Then, determine the scope of your dimension . Depending on whether the event parameter represents an action that was taken (an “event scoped” dimension) or the user who was taking the action (a “user scoped” dimension).
- The third field is the description. This is optional and is displayed in the blue box below. Kindly consider it as a personalized note.
- The most important field is the fourth one. You can see the event parameter in the green box. The event parameter field in the case of GA4 custom events and their related parameters must be typed exactly as it is in the GA4 event tag you’ve defined in Google Tag Manager.
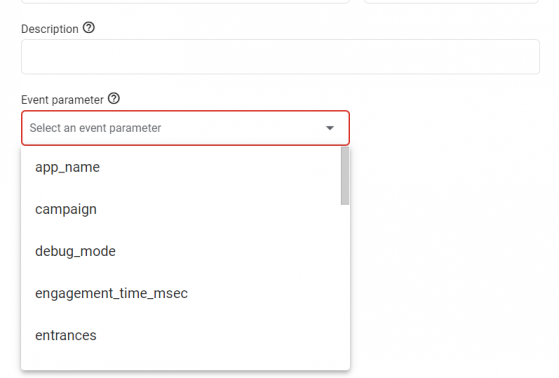
- You can either select the event parameter from the drop-down menu or type your own.
- Click save.
For instance, here, your website has a CTA button and you created a GA4 event tag in the GTM. You want to track its click url.
Now, you want to track this information in GA4, simply choose an event-scoped dimension in this case and type the event parameter the same as you did GA4 event tag in Google Tag Manager. Give it any name and description you like, and when you’re ready, click “Save.” just as shown below.
Custom dimensions and GDS
These days, reporting can be eased by tools like Google Data Studio (GDS). We can drastically cut down the time it takes to create reports by using GDS. Additionally, with the correct strategy, we can use Data Studio to generate reports that depict our whole marketing strategy.
But, one of the struggles while creating a GDS report is that you can only represent the default metrics and dimensions that are provided by GA4.
If you have created custom GA4 event tags through Google Tag Manager and you want to represent the custom event parameters in a GDS report, you have to first create custom dimensions in GA4 to track those parameters associated with the custom events.
We’ll understand this more thoroughly with the help of an example.
Now, I have a website which has CTA button. I have created a GA4 event tag in Google Tag Manager to track the clicks, but I also want to know the click url so I have set the custom event parameters as shown below.
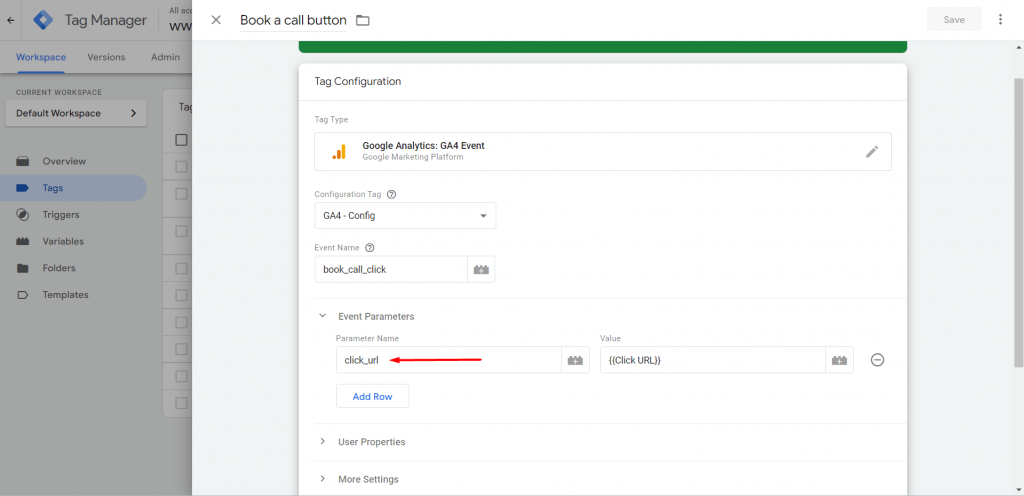
This parameter ‘click_url’ will neither show up in GA4 nor in the GDS until you make custom dimensions in GA4.
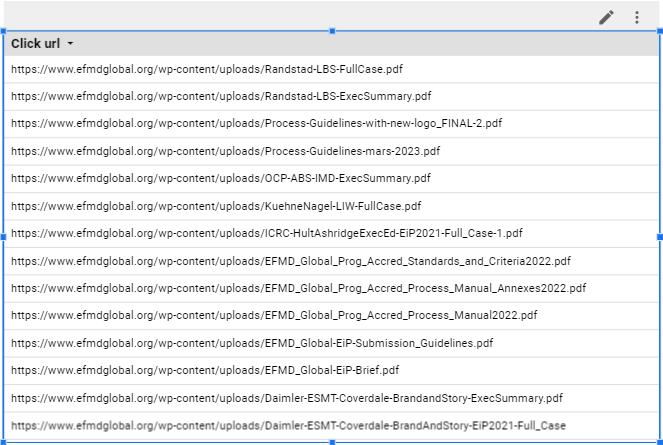
Now, as we have created custom dimensions, this data will also be available now in GDS.
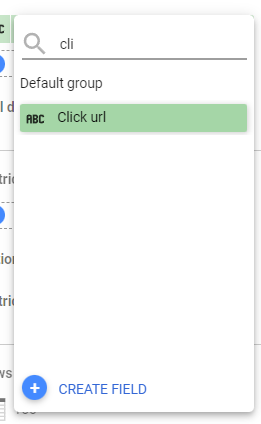
And now the reports can be made easily.
