How-to / GA4 Setup
How to create a custom audience in GA4
In this guide, you will learn what a custom audience is and how to create them in GA4.
What is a custom audience?
Audiences in Google Analytics 4 allow you to build a list of users to whom you can later show your ads. Also, you can use audiences to compare data in your reports. For example how this audience performed against that audience. Last but not least, you can even automatically create new events in GA4 when people enter those audiences.
You can segment your website visitors into audiences. This audience segmentation can be accomplished through the use of various metrics, user behavior, or user attributes. This segmented audience is called the Custom audience.
GA4 custom audience membership duration explained
In GA4, custom audience membership duration is the number of days a user stays in an audience after they meet its conditions. The default membership duration is 30 days, and you can set it anywhere up to a maximum of 540 days. A shorter duration keeps an audience fresh and focused on recent behaviour, which suits remarketing; a longer duration keeps users in the audience even if they do not return for a while. You set the membership duration while building the audience, in the same panel where you define its conditions.
How to create a custom audience in GA4?
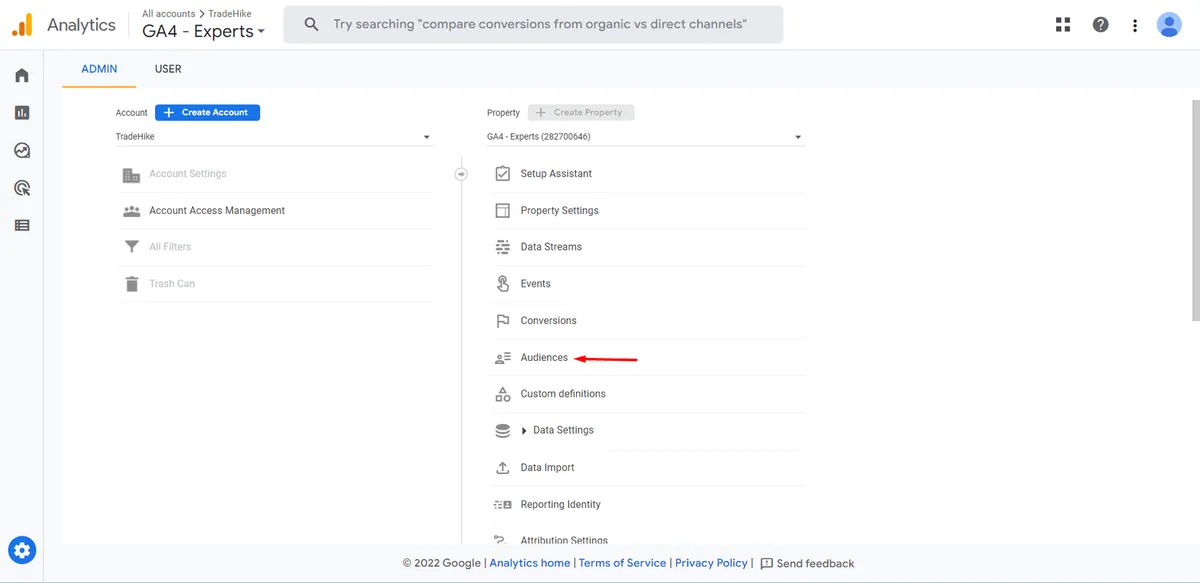
STEP 1: Go to Admin
STEP 2: Go to Audiences.
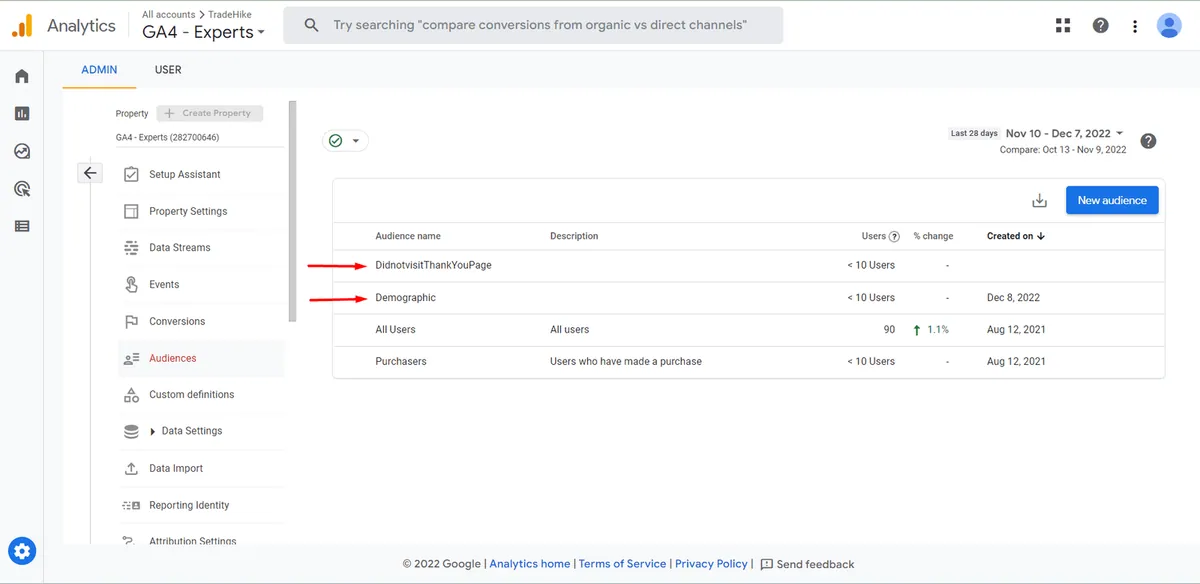
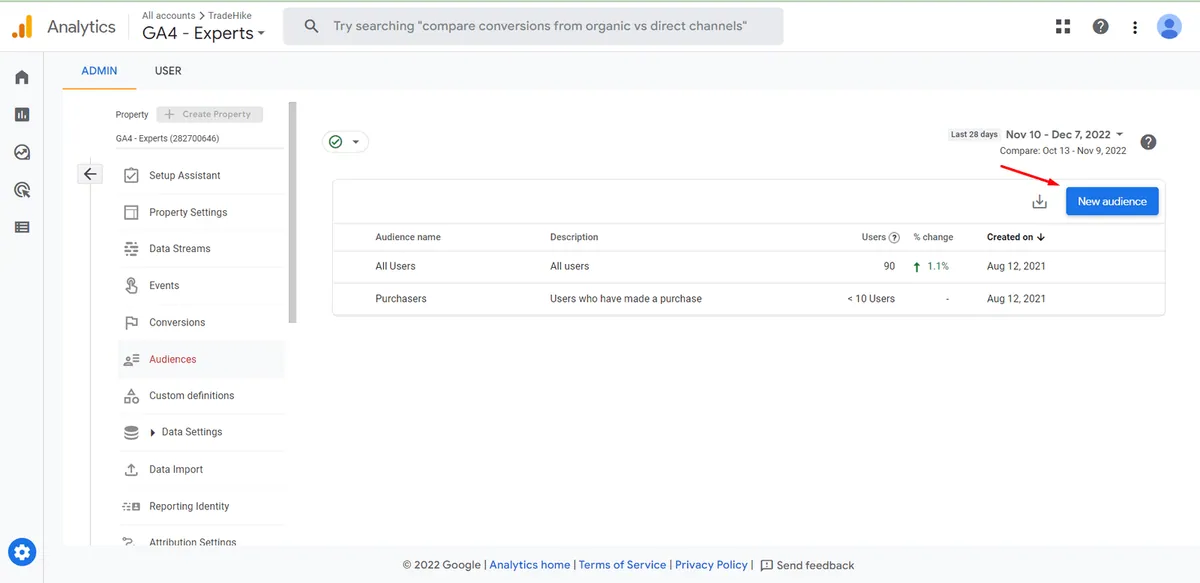
STEP 3: Here, two audiences are already present by default namely ‘All Users’ and ‘Purchasers’.
Click on ‘New audience’.
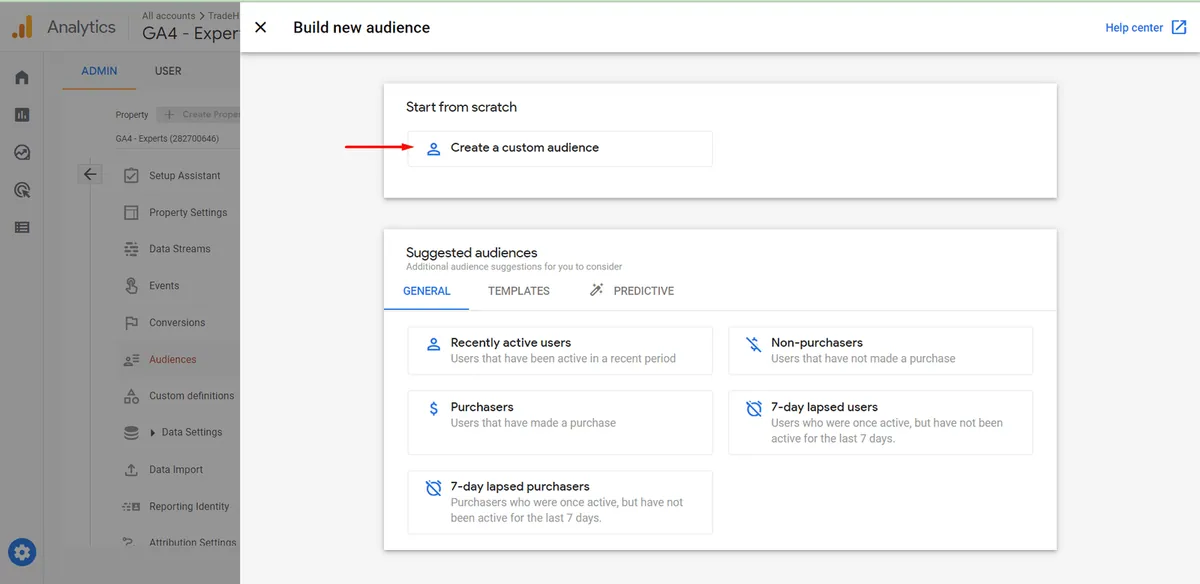
STEP 4: You can either use the templates to create the audience or create one from scratch.
To create from scratch, click here.
Now, we’ll take two cases for better understanding.
CASE 1 :
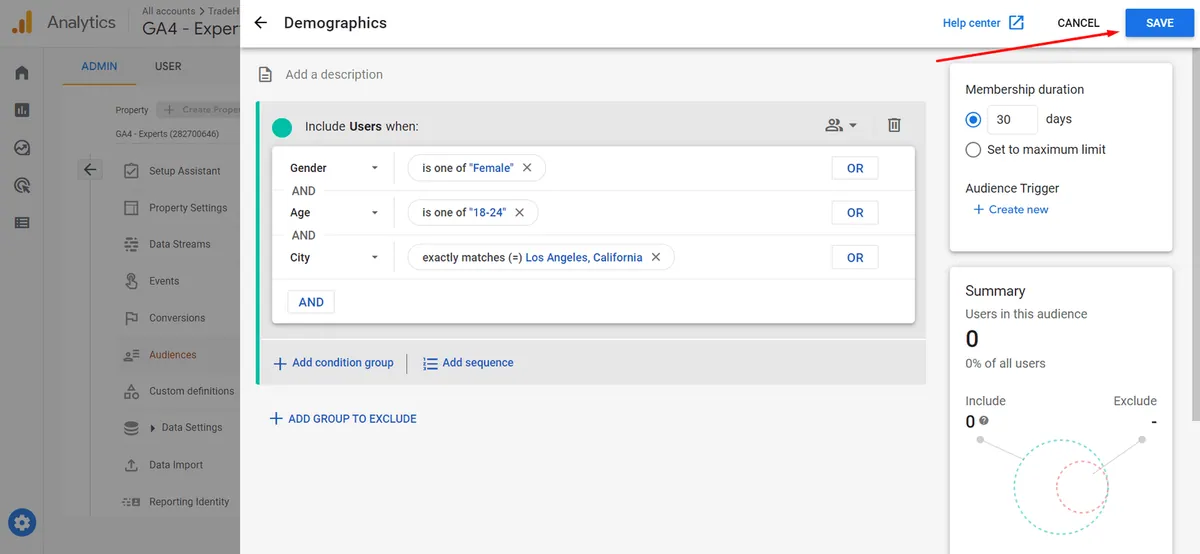
Targeting through demographics:
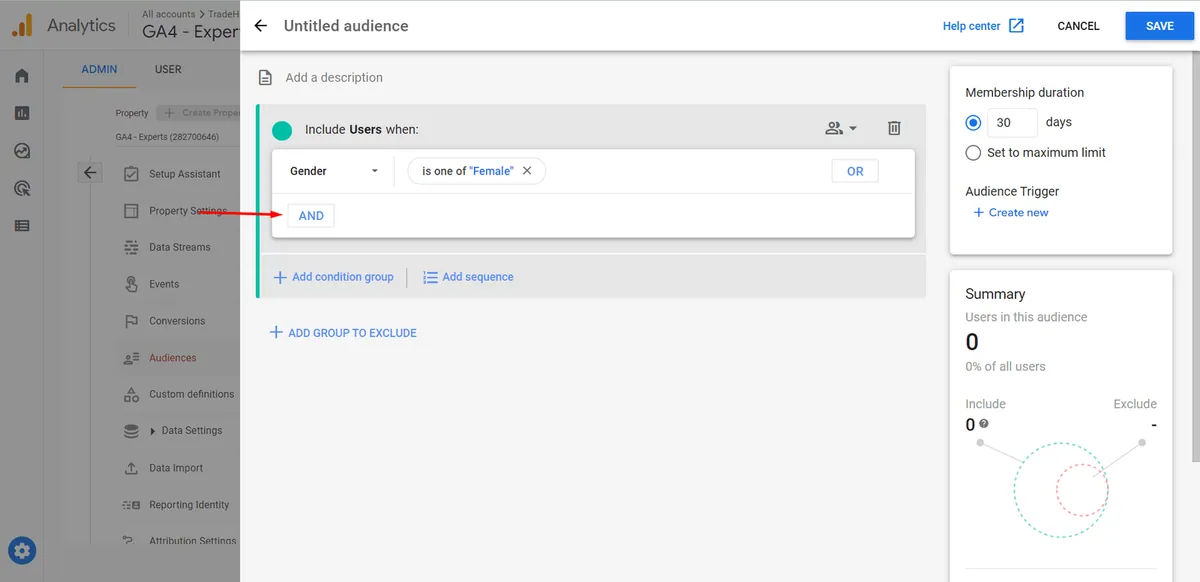
Gender- Female
Age- 18-24
City- Los Angeles
STEP 5:
Choose the first condition and its parameter as shown below.
Here, ‘AND’ and ‘OR’ both have different uses.
Click ‘AND’ to add the next condition.
STEP 6: Add the other conditions and click on save.
CASE 2:
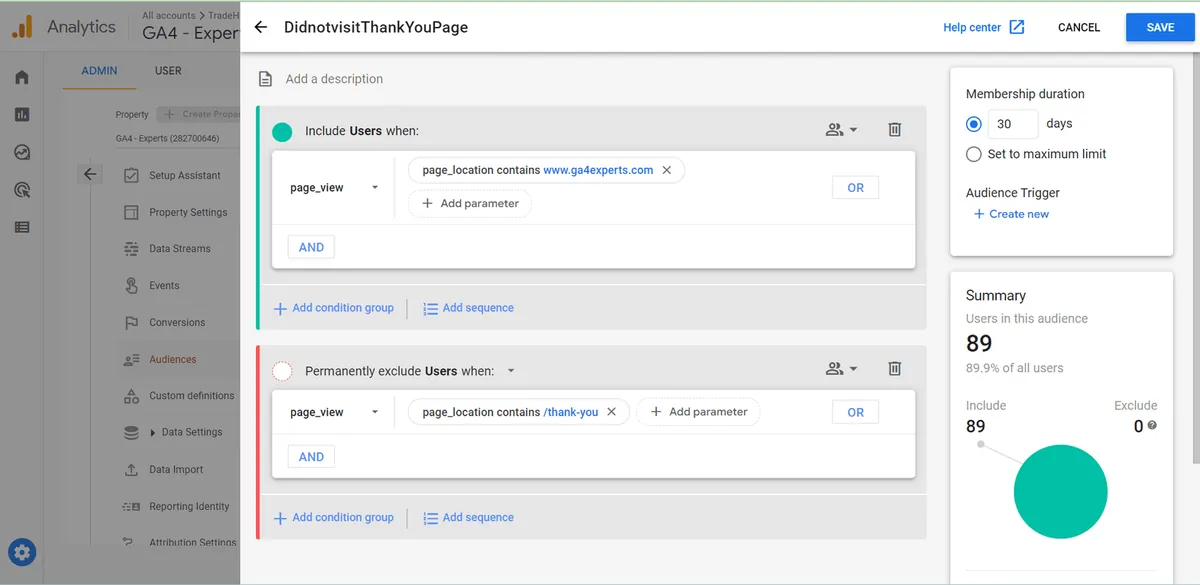
Visited the website but did not visit thankyou page. (didn’t complete the conversion)
STEP 7: Add the condition as ‘page view’ and its parameter as ‘page location’ which should contain the URL of your website.
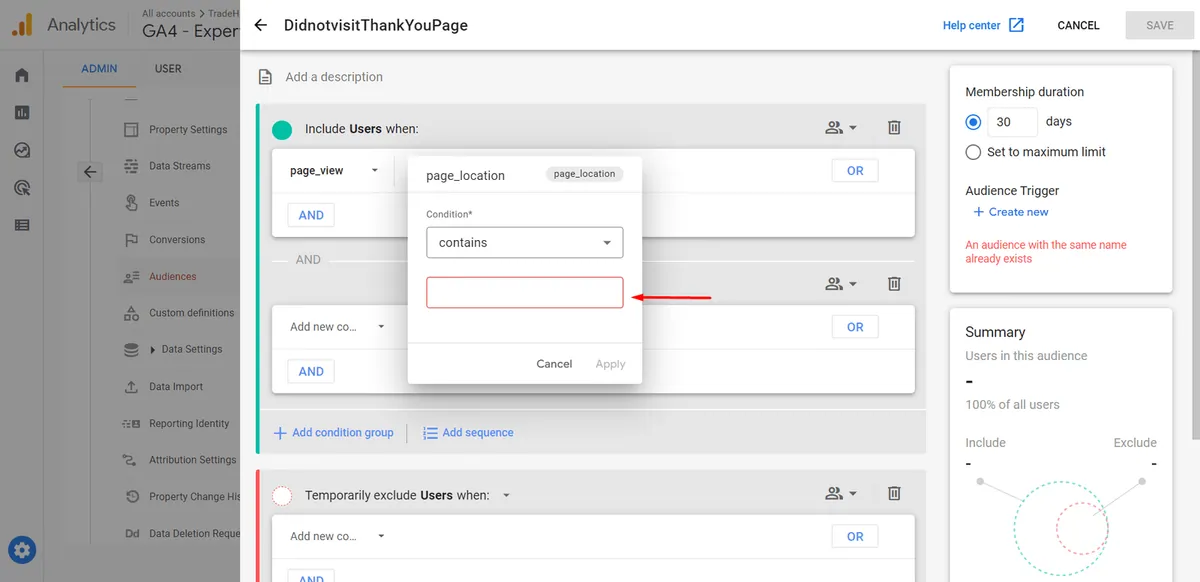
STEP 8: Now, click on the arrow and switch to ‘permanent exclude’, and click on ‘Add condition group’.
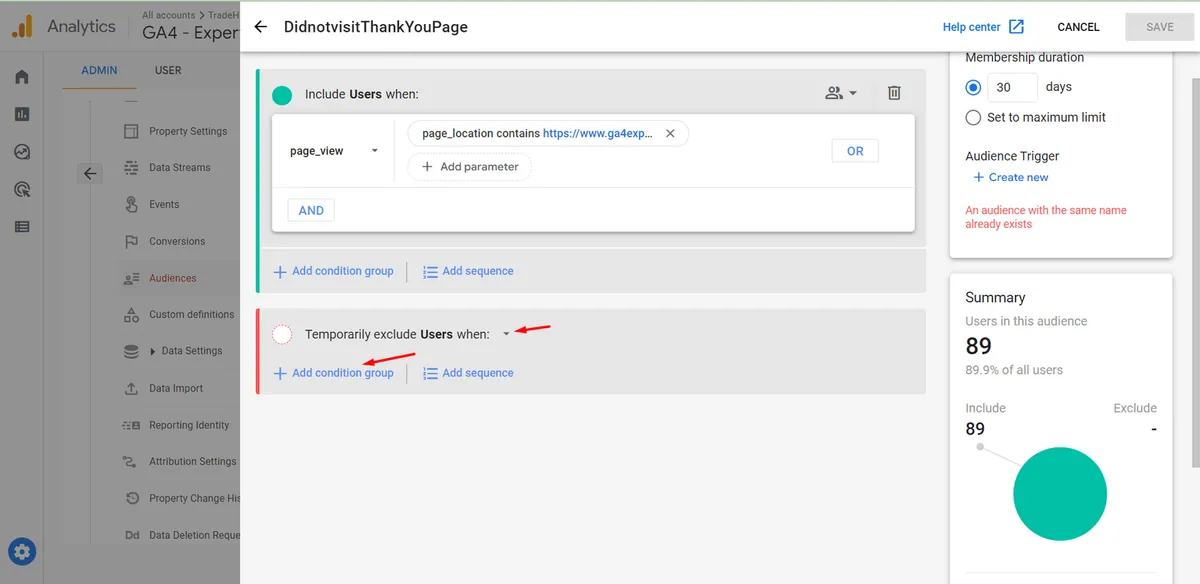
STEP 9: Add the condition as ‘page view’ and its parameter as ‘page location’ which should contain the URL of your ‘Thankyou’ page as shown below.
Click on save.
Now, as you can see both audiences are saved and you can explore them by clicking on them.
You can either name your audience while creating it or you can edit it later after saving it in the Audience section.